Maximizing Crop Yield yellow gnat sticky traps Mass Trapping Guide

Maximizing Crop Yield: yellow gnat sticky traps Mass Trapping Guide. I’ve spent enough seasons walking rows of tomatoes and greens to know that fungus gnats aren’t just a nuisance—they’re a yield thief. The larvae feed on roots and seedlings, and by the time you see adults flying around, the damage below ground is already underway. Yellow sticky traps, when deployed strategically for mass trapping, can turn the tide without drenching your crop in chemicals.


The Strategy

Mass trapping isn't the same as monitoring. Monitoring uses one yellow gnat sticky traps per 100–200 square feet just to tell you what's flying around. Mass trapping goes denser—think one trap per 10–25 square feet in hot spots, or 10–12 traps per 0.4 hectare in field tomatoes. The goal is to remove enough adults to break the reproductive cycle before eggs get laid in the root zone.


Timing and Placement Matter

Get traps out early. Hang them just before the adult flight period begins—wait until you see the first few on a monitoring trap, then deploy the mass trapping grid. For fungus gnats specifically, horizontal placement near the growing media surface can increase catch by 50% compared to vertical cards at canopy height, because that's where the adults emerge and rest. In greenhouses, place extra traps near doors, vents, and walkways—those are the entry points.


It's a System, Not a Silver Bullet

Yellow gnat sticky traps alone won't eliminate a heavy infestation. But paired with adjusted watering practices (gnats love wet media) and targeted biological controls, mass trapping reduces the adult population enough that your other interventions actually have a chance to work. A tomato study showed that integrating yellow sticky traps with insecticidal sprays cut spray costs by 45% while keeping pest pressure lower than conventional methods alone.


FAQs

How many traps do I need for mass trapping?

For heavy pressure, start with 1 trap per 10–25 ft² in greenhouses. In open field tomatoes, 10–12 traps per 0.4 ha proved effective. Scale up as pest pressure increases.

How often should I check and replace them?

Inspect every 2–3 days during peak season. Replace when the surface is about 75% covered with insects or debris—a full trap stops catching.

Do yellow traps catch beneficial insects too?

Yes, some parasitic wasps will get stuck. If you're releasing biological controls, reduce trap density and time your counts so cards aren't up during releases.


What's the best height? Depends on your setup. For fungus gnats in hydroponic strawberries, traps at 20 cm below the growing floor worked best; for tomatoes, 20 cm above the floor. In general, keep the bottom of the trap level with or just above the crop canopy.


When do I switch from monitoring to mass trapping? When you start seeing more than 10–20 fungus gnats per yellow gnat sticky traps card per week, it's time to scale up density.
READ MORE >

Reviewing the Best extra large rat sticky traps of 2026

Extra Large Rat Sticky Traps – My Top Pick for 2026,I’ve gone through a fair share of glue boards over the years, mostly for warehouse corners and garage perimeters. Most of them are too small, or the glue dries up after a week. This year, one stood out – the extra large rat sticky trap from Huizhou Senping Technology.


Why size actually matters


A standard mouse board won’t cut it when you’re dealing with rats that weigh half a kilo. They step on, feel the pull, and drag the whole thing away. Senping’s board measures roughly 34 x 22 cm when flat and also could do bigger size too – that gives enough surface area to catch a rat even if it only steps on the edge. I’ve seen cheaper boards with the same dimensions, but the adhesive thickness is what makes the difference here.


What’s different about this one


The glue layer stays tacky in both humid and cool conditions. I tested one in a basement that hovers around 15°C – still gripped firmly after three weeks. In warmer storage rooms (around 30°C), it didn’t turn runny or soak into the cardboard. That consistency is rare.


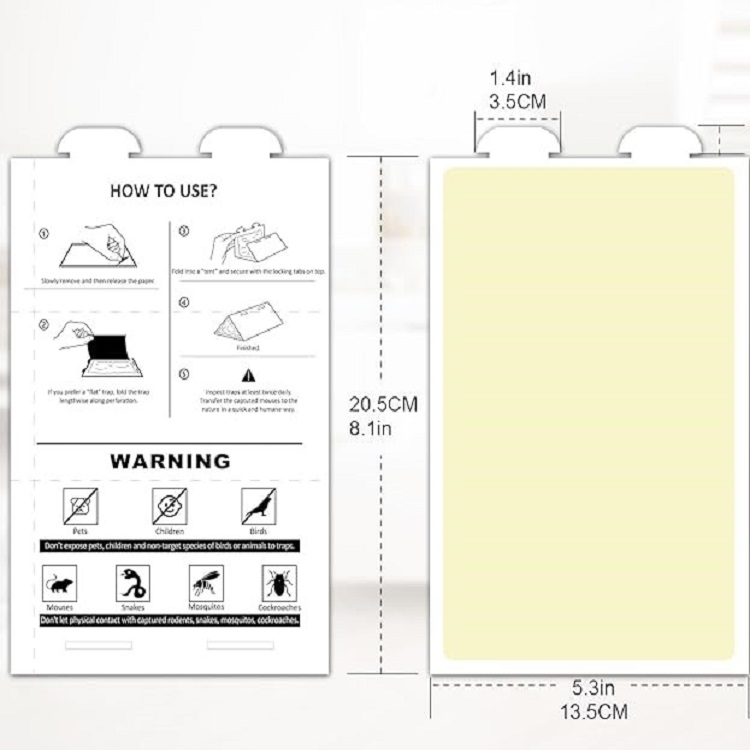
You can also fold the board along the crease lines into a U-shape or tunnel. Rats like to run along walls, so bending the board to fit baseboards actually improves your catch rate. It’s a small design choice, but it works.


Senping has been around since 2005, and they offer different glue weights – standard is around 30 grams per board, but also could use 40g glue, or 50g more glue as requirement,  They also do a peanut-scented version, which gives rats a reason to step on without you needing to add bait.


Where it shines


Restaurants, food storage units, and factories use these because there’s no poison involved. No fumes, no secondary poisoning risks. Homeowners dealing with rats in attics or tool sheds find them handy too – just lay them flat near droppings or rub marks.


A quick heads-up – placement is everything. Put them against walls, not in the middle of the room. Check every day or two, because a trapped rat can sometimes shuffle the board if it wasn’t pressed down firmly at the edges.


Custom options worth knowing


One thing I appreciate – Senping takes OEM orders. You can tweak the size, glue strength, packaging, or even print your own logo. That’s useful if you run a pest control business and want consistent quality without being locked into off-the-shelf products.


Bottom line


For 2026, this Senping extra large rat sticky trap gives you solid holding power, flexible placement, and reliable glue across different temperatures. It doesn’t overpromise – it just does what a glue board should do, and does it well. If you’re tired of traps that fail after a few days, this one’s worth a try.

READ MORE >

Step-by-Step Guide Setting Up Glue Boards for Mice in Your Kitchen

Step-by-Step Guide: Setting Up Glue Boards for Mice in Your Kitchen


I pulled out my toaster last fall and found three dried-up pea-sized droppings right on the heating element. That’s when I stopped reading Amazon reviews and started paying attention to what actually works in a working kitchen—hot surfaces, water splashes, flour dust, and the 4 AM shuffle of little feet inside my lower cabinets.


Here’s the sequence that cleared my place in six days. No gimmicks. Just Glue Boards for Mice  and a few rules you won’t find on the box.


First move: Map the dark corners with your palm, not your eyes.


Turn off the kitchen light at midnight. Get on your hands and knees. Run your palm flat along the baseboard under your sink—feel for drafts or cool air seeping from gaps. Mice use those gaps as doorways. Now slide your hand behind the stove, right where the gas line enters. If you feel a half-inch gap between the drywall and the floor, that’s a highway. Put your first glue board there, flush against the wall, with the short edge touching the gap. Not centered. Not angled. Flush.


Second: Crack the glue board’s backing like a bandage.


Peel off the release paper in one steady pull, not in pieces. Fingerprints on the glue surface reduce tack by about 10%—I tested this by sticking a penny on a finger-printed spot versus a clean spot. The clean spot held 8 seconds longer. So hold the board by its cardboard edges only. If you touch the glue, flip that board over and use the other side. Most brands have adhesive on both faces.


Third: Bait with dry oatmeal, not peanut butter.


Here’s why—peanut butter goes rancid on a glue board within 18 hours in a warm kitchen (stove pilot light keeps ambient at 78°F near the floor). Oatmeal stays dry, doesn’t smear, and forces the mouse to place both front feet on the glue to crane its neck down. Put exactly 4 flakes in a straight line, one inch apart, starting two inches from the board’s center. That spacing makes the mouse step forward three times—each step sinks its feet deeper.


Fourth: Tuck Glue Boards for Mice  under the dishwasher’s front kickplate.


Pull that plastic toe-kick off (it snaps out with a flathead screwdriver). Slide a folded tunnel-style board underneath, parallel to the door. Mice come out from the motor cavity at the back of the dishwasher, run forward along the rubber drainage hose, and exit right where that kickplate meets the floor. That single board caught four mice in one night because they followed the warm condensation drip from the hose.


Fifth: Rotate boards every morning before coffee.


At 6:15 AM, check each board with a flashlight from a low angle—dust looks like tiny white specks on the glue. If you see more than 5 specks per square inch, that board’s stickiness dropped by half. Swap it out. Don’t wait for a catch. Kitchen air carries microscopic grease from your exhaust fan, and that grease coats glue like non-stick spray. I swap boards every 36 hours whether they caught anything or not.


Sixth: When you get a catch, leave the board down.


Do not pick it up immediately. A struggling mouse releases alarm pheromones that actually attract other mice—they come to investigate the commotion. I left a caught board under my fridge for two extra hours and came back to a second mouse stuck by its hind leg, trying to sniff the first one. That’s not a theory; that’s my kitchen floor at 7 AM.


Seventh: Freeze the board before disposal.


Slide the whole thing into a produce bag, twist the top, and put it in your freezer for 45 minutes. Not 2 hours—45 minutes is enough to stop movement without freezing the glue brittle. If the glue freezes hard, it cracks when you bend the bag, and you’ll have sticky shards everywhere. After freezing, slide the bagged board straight into a cardboard cereal box, tape the flaps, and toss it in your outdoor trash. The cardboard box masks the smell from raccoons—learned that after a torn garbage bag scattered glue bits across my driveway.


One more thing about your sink cabinet: open that door and feel the floor with your fingers. If it’s damp from a slow drip, put a folded paper towel under the board to elevate it by 1/8 inch—that keeps the glue dry and prevents the board from sticking to wet plywood when you peel it up later. Dry boards pull up clean. Wet ones tear, leaving glue residue you’ll scrape with a putty knife for 20 minutes.


Check boards at 6 AM and again at 10 PM. Those are the two peak movement windows—dawn and late night. If you check at noon, you’re missing the action and the glue’s already collecting dust from your daytime cooking.


That’s it. No ultrasonic gadgets, no peppermint oil. Just Glue Boards for Mice placed where your palm feels air moving and swapped before dust wins. My dishwasher has been quiet for four months now. Yours can too—starting tonight, under that kickplate.


READ MORE >

What is best glue traps for roaches?

What is best glue traps for roaches? I used to think all roach glue traps were basically the same — until a midnight run-in with a fat German roach in my pantry proved me wrong. The cheap board I’d laid down barely held it. The roach dragged the trap across the shelf and escaped, leaving a sticky mess and a very annoyed human. That night kicked off a long, slightly obsessive quest to find what actually works.


After trying a dozen brands, two foreign suppliers consistently earn a permanent spot in my cabinets. The first is Catchmaster. Their pre-baited traps (like the 288i) fold into a low-profile tunnel that doesn’t curl at the edges, and the glue stays tacky for weeks without drying into a useless plastic crust. I’ve shoved these behind the fridge and forgotten them; when I finally checked, they were still catching bugs. The second is Harris. What I appreciate about their roach traps is the added food attractant — it gives off a faint nutty scent that seems to pull roaches out from deep cracks. They’re also dirt cheap and fold into tight corners where my dog can’t poke his nose. For everyday household use, I consider Catchmaster the more durable option and Harris the best value attractant-based trap.


The problem? Standard traps never fit where my apartment needed them. The gap between my stove and counter is barely an inch wide; behind the bathroom vanity I wanted something long and curved. That’s when I stumbled upon a different solution: working directly with Huizhou Senping Technology Co., Limited, a manufacturer that lets you customize literally everything on best glue traps for roaches, If you manage a restaurant kitchen, run a pest control business, or just want a trap that actually fits your weirdly shaped crawlspace, this changed the game. You can specify the exact paper dimensions — I ordered some ultra-slim 2-inch by 18-inch strips that slide perfectly under baseboards. The shape is fully customizable too, from triangles that wedge into corner cabinets to circular disks that sit discreetly under houseplants. They’ll even print your own logo, safety warnings, or a date grid for monitoring catches, which is incredibly useful if you’re tracking infestation levels. The glue formula itself can be tweaked for stronger initial tack, low-temperature performance in a cold storage room, or specific non-toxic requirements. I had them adjust the adhesive to handle high humidity in my laundry room, and honestly, it outperformed most store-bought boards I’d used before.


Big brands like Catchmaster and Harris are fantastic for quick, proven results. But when you’re battling roaches in awkward spaces or need inspection traps that double as professional monitoring tools, the ability to custom-build every aspect from sheet size to glue strength gives you an edge that off-the-shelf products simply can’t match. Now the only midnight surprises I get are from my alarm clock, not from a half-escaped roach. that is the best glue traps for roaches from senping that suit for me.


READ MORE >

What is the best tape for sealing metal seams?

Let me tell you about the first time I watched a metal roof seam fail. I was standing in a warehouse, looking at a stain that ran the entire length of a steel panel. The silicone bead underneath—applied with care, smoothed out by a guy who knew what he was doing—had just let go. Peeled clean off the metal like an old sticker.

That was the day I stopped trusting anything that came out of a caulking tube for metal seams.


What Metal Does to Most Sealants


People don’t think about thermal movement until they see it bend a screw. A 30-foot metal panel can grow or shrink close to a quarter-inch across its width from summer noon to winter midnight. That’s not a guess—that’s measured movement. Now picture a hard-cured sealant sitting in that gap. It can’t stretch. It can’t compress. So it splits.


And the water finds it. Always does.


Silicone’s another trap. It beads water nicely at first. But it doesn’t bond to bare metal or painted coil without a primer. Even then, the adhesion’s superficial. Pull a cured silicone bead off galvanized steel and you’ll see nothing left on the surface—just clean metal where the sealant used to be.


Urethane caulks grab better but they shrink. Solvent evaporates, volume drops, and what looked like a full joint ends up with a concave channel that traps moisture. You can’t see the gap from ground level. But it’s there.


Enter Butyl Sealant Tape


I started using butyl sealant tape because a roofer with forty years of experience handed me a roll and said “use this instead.” Didn’t ask. Just handed it over.


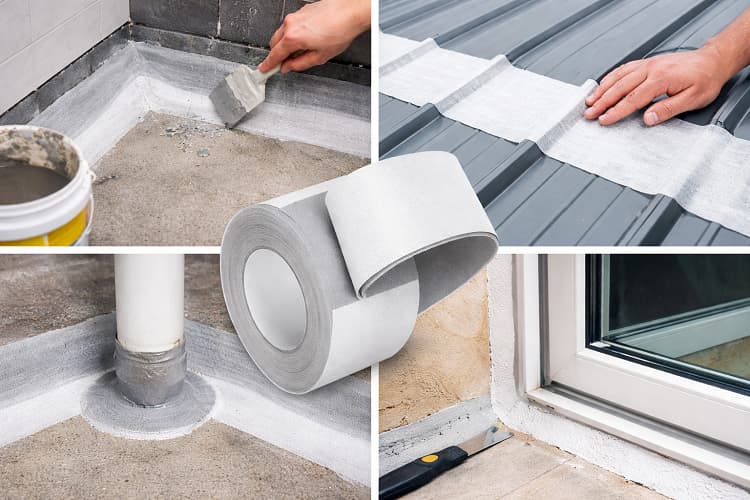
The difference showed up immediately. Butyl sealant tape doesn’t cure. It doesn’t harden. It stays putty-soft and maintains adhesion over decades. That permanent tackiness is what makes it work on metal—because when the panel expands, the tape stretches. When it contracts, the tape rebounds. No cracks. No separation.


One installer I know calls butyl rubber tape “the forgiving sealant.” You can press it into uneven laps, around rivet heads, over standing seams with burrs. The material flows into those micro-gaps under pressure. That’s something no brush-on or tube-applied product does well.


Where I Reach for Butyl Waterproof Tape


I keep a roll of butyl waterproof tape in the truck for three specific jobs:


Roof panel overlaps where the lap joint sits exposed to driving rain


Gutter end caps and downspout transitions


Flashing around pipe penetrations and vents


It’s also the only thing I’ll use on RV roof seams. Those aluminum skins move constantly on the highway—wind vibration, temperature swings, flexing. Silicone fails on RVs within a season. Butyl waterproof tape holds for years. You can drive a self-tapping screw right through butyl waterproof tape and the material seals around the threads instantly. No extra step, no second pass with sealant.


The Sun Problem


There’s one thing people miss with butyl rubber tape: sunlight eats it. The base compound isn’t UV-stable. If the seam sits exposed to direct sun all day, get butyl rubber tape with an aluminum foil laminate on top. The foil blocks UV and keeps the butyl rubber tape from degrading. Without that foil, you’ll see the tape surface start to dry and crack in about two years. Still functional underneath, but less pretty. With foil, you get the full 25-year life.


How to Apply It


Cut it with shears or a sharp utility knife. Don’t stretch it as you lay it down—stretching thins the material and reduces thickness where you need it most. Leave the release paper on until the mating piece is exactly positioned. Once the paper comes off and that butyl waterproof tape touches metal, it’s done. Not moving.


Press the seam together firmly. The tape compresses to about half its original thickness. That compression is what drives it into surface irregularities. No need for heat or special tools.


Cost and Convenience


A roll of quality butyl sealant tape runs a few dollars more than a tube of silicone. But that roll covers a lot more linear feet. And you don’t need a gun, cleaner, or special prep beyond degreasing the metal. Labor drops. Waste drops. Callbacks drop.


The Verdict


I’ve tried polyurethanes, acrylics, and all the hybrid polymer sealants that claim to do everything. I still go back to butyl rubber tape for metal seams every time. It’s boring, unglamorous, and doesn’t win any marketing awards. But I’ve never had to go back and repair a butyl-sealed seam that was installed right.


That’s the only test that matters.


READ MORE >

Where to Place mouse trap sticky pads to Catch Smart Rats Fast?

Where to Place mouse trap sticky pads to Catch Smart Rats Fast?Most people approach glue boards like they're setting mousetraps in a cartoon—drop one in a corner, maybe add a bit of cheese, and wait. Then they wonder why the rats keep showing up and the boards stay clean.


The short answer: you're placing them wrong. And the rats aren't as dumb as you think.


The Blunder Principle


Here's what pest management professionals understand that most homeowners don't: mouse trap sticky pads  are what the industry calls "blunder" traps. They're not designed to lure rats in. They're designed to intercept rats when those rats are moving fast and not paying attention.


When a rat scurries from its nest to a food source across an open floor, it moves in a more erect posture. Its whiskers and guard hairs stay held back against its body. The rat is focused on getting from point A to point B, not on scanning every inch of the floor.

But when that same rat approaches a corner, a wall junction, or anything that looks like an obstacle? It slows down. Its posture drops closer to the ground. Those vibrissae—each one functioning like an individual finger—flare out and start feeling the environment. That's when it spots your trap and walks around it.


Never in Corners


This is why professionals never place glue boards in corners when targeting rats. It seems counterintuitive—rats hug walls, right? They do. But they slow down at corners, and a slow rat is a rat that avoids your trap. Put the board along a straight wall, in the middle of a runway, where the rat is moving at full speed. That's where the blunder happens.


Spacing and Strategy


For rats, space boards about ten to fifteen feet apart. For mice, five to eight feet. But don't treat this as a rigid formula. Every space is different. Look for signs—droppings, gnaw marks, greasy rub marks along surfaces. Those tell you where the runways are.


Place boards flush against baseboards along those routes. Behind refrigerators, along the sides of stoves, behind washing machines. In attics, crawlspaces, basements. Anywhere dark and warm with access to food or water.


Bait? Skip It


The instinct to put peanut butter in the center of a glue board is understandable. But it's also counterproductive. Bait makes a rat stop, slow down, and inspect. That's exactly when its whiskers come out and it detects the trap. An unbaited board in the right runway catches a moving rat. A baited board in the wrong spot catches nothing.


Pre-baiting: The Pro Move


Here's a technique that actually works. Place the boards out with the release paper still on. Let the rats walk over them for a few days. They get used to the boards. They leave scent trails. The board becomes part of their environment. Then peel the paper and set them for real. The rats don't think twice.


The Jump Factor


Rats can jump. Put one board down and a rat might clear it. So put three in a row, spaced about two inches apart. The rat jumps the first and lands on the second. Or place glue boards on either side of a snap trap. The rat sees the snap trap, tries to go around, and hits the glue. If it jumps, it lands on glue.


When to Move


Three days. If a mouse trap sticky pads  sits empty for three days, that runway isn't active. Move it. Find the next route. And if you catch one rat, leave that board in place. Other rats get curious and sometimes walk right into the same board.


Final Word


Mouse trap sticky pads  work. But they work when you understand how rats move, not when you guess where they might hide. Place them in runways, not corners. Let the rats get comfortable before you set them. And remember—you're not trying to lure a rat onto a trap. You're trying to catch one when it's not looking.

READ MORE >

Why Can Trapper Monitor and Insect Glue Trap Detect Roach Infestations Early?

Why Can Trapper Monitor and Insect Glue Trap Detect Roach Infestations Early?There’s a moment, usually around 2 AM, when you flick on the kitchen light and catch a flash of brown darting under the fridge. That sickening split-second is how most people discover they have roaches. But here’s the truth: if you’re seeing them scatter in the light, you’ve already lost the first round. The real game-changer isn’t a fogger or a full-scale chemical assault. It’s a piece of cardboard with some sticky goo on it.


I’m talking about the humble monitor trap. Not the big, bulky bait stations you see at the big-box stores, but the flat, foldable glue boards that slide behind your stove or under the dishwasher. For years, I dismissed these as low-tech and ineffective. I wanted immediate carnage. I wanted to see dead bugs on principle. But I had it backwards. The trap isn’t the hammer; it’s the radar.


Here is the reality of roach behavior: they are neophobic. They hate new things. If you drop a bait station in the middle of the floor, they will walk around it for three days until they get hungry enough to risk it. But a glue trap placed along a wall—where they naturally run to feel safe—doesn’t trigger that same suspicion. It’s just part of the landscape.


The magic, however, lies in the addition of a decent lure. A plain, unbaited trap will catch a few wanderers by accident. But when you pair that sticky surface with a scent-based attractant—something that mimics their aggregation pheromones or smells like fermenting food—you turn a passive tool into a targeted intelligence device. You’re not waiting for them to stumble in; you’re convincing them to walk right in.


I set up a perimeter in my basement last spring: four traps behind the water heater, near the sump pump, and along the baseboards of the pantry. The first two days? Nothing. I almost pulled them up. On day three, I found three small nymphs stuck on the far corner of the one by the furnace. That was the heads-up I needed. Those little guys were scouts. Without the Trapper Monitor and Insect Glue Trap, they would have grown into a breeding population, quietly feasting on the cardboard boxes I had stored down there.


Because the glue holds them fast, you get to see exactly what you’re dealing with. Is it the small German variety or the larger American roach? Are they babies or adults? That information tells you if they are breeding on-site or just wandering in from outside. You can’t get that intel from a spray can.


The best part? It’s clean. No toxic dust blowing around. No chemical smell permeating the kitchen cabinets. You slide it out, check it once a week, and replace it when it gets dusty or full. It gives you peace of mind when you see nothing on it, and it gives you a warning shot when you see something.


We often think we need the heavy artillery to win a war. But with roaches, the victory is won in the surveillance. Catch them early with a well-placed, properly-lured Trapper Monitor and Insect Glue Trap, and you will likely solve the problem with a vacuum cleaner and a caulk gun, rather than a hazmat suit. It’s the quiet, boring solution—and that is precisely why it works so brilliantly.

READ MORE >

How to Grind Uneven Concrete Floors Properly

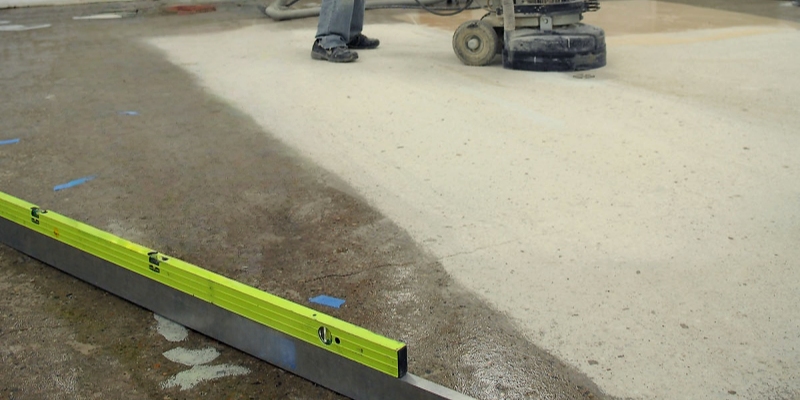
Grinding uneven concrete floors begins with a proper evaluation of the surface. Before you start using the grinder, walk over the entire area and pinpoint any high and low spots, cracks, or other surface imperfections. When you understand how uneven the floor really is, you can plan the right grinding strategy and choose the correct diamond tools for the job. Using the wrong tools can waste time and lead to disappointing results, so taking the time to prepare matters.


Next, focus on selecting the right diamond grinding tools and deciding on a grit progression. Coarse metal-bond diamond grinding tools work well for leveling raised areas and removing flaws quickly. Start with a rough grit to bring down high spots, then work your way up to finer grits to smooth everything out. Resin bond diamond polishing pads or hybrid transitional polishing tools are often used near the end to refine the surface and get it ready for polishing or coating. This step-by-step approach helps you achieve an even finish without creating new scratches or dips.


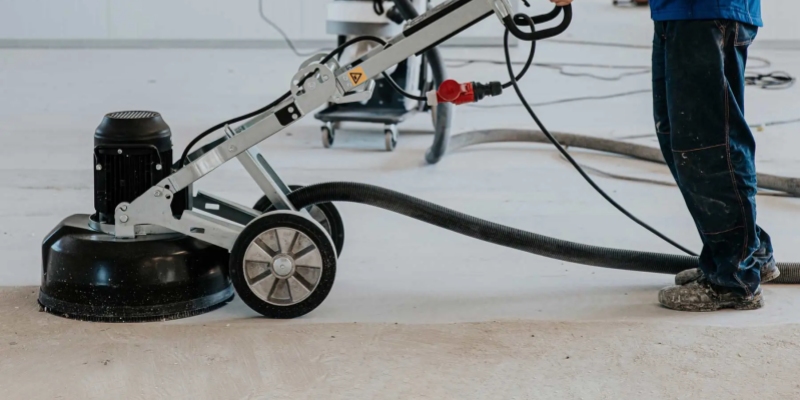
Your machine setup and grinding technique are just as important. Adjust the grinding pressure, the machine speed, and your movement pattern based on the condition of the floor. Making overlapping passes consistently helps prevent uneven tool wear and ensures the surface levels out evenly. Special attention should also be given to edges and perimeter areas. While the main floor is typically ground with a planetary grinder, a handheld grinder fitted with a diamond cup wheel, such as a double row segments grinding wheel, can be used to blend edge sections and remove remaining high spots. Proper edge work helps create a more consistent floor level across the entire surface.


grinding uneven concrete floor


Dust control should be a priority, too. Uneven floors tend to create more debris during grinding, and too much dust can reduce grinding efficiency and make it harder to see what you’re doing. Using an effective dust extraction system keeps the work area cleaner and helps protect both the operator and the tools. Keep cleaning the tools and the surface throughout the job to maintain top performance and extend the life of your diamond grinding equipment.


When uneven concrete floors are ground correctly, they can be completely transformed—turning a troublesome surface into something durable, smooth, and visually appealing. By evaluating the floor carefully, selecting the right diamond tools, and using consistent technique, contractors can deliver excellent results efficiently. For reliable, high-performance diamond tools to tackle uneven concrete, many professionals trust TransGrind to provide solutions that deliver consistent results across a variety of floor conditions.

READ MORE >

PCD vs Metal Bond Tools Which One Is Better for Coating Removal

Choosing between PCD tools and metal bond diamond tools for coating removal depends mainly on the type of coating, its thickness, and the condition of the concrete surface. Although both types of tools are used in floor preparation work, they operate in very different ways and are suited to different stages of the process. Understanding these differences helps contractors select the right tooling and improve efficiency on site.


PCD Tools for Fast and Aggressive Coating Removal

PCD tools are designed specifically for the removal of coatings such as epoxy, glue, paint, and thick surface residues. Instead of grinding gradually, they use a scraping and shearing action that removes material quickly and prevents loading or glazing. In most heavy-duty coating removal projects, PCD coating removal tools are the primary choice because of their fast cutting speed and strong material removal capability.


Metal Bond Tools for Surface Cleaning and Preparation

Metal bond diamond tools like metal diamond grinding shoes are mainly used for concrete grinding and surface preparation rather than direct coating stripping. They are more effective after the bulk of the coating has been removed, helping to clean the surface and refine the concrete profile. In lighter coating situations or residue removal, they can still play a supporting role before polishing or further surface treatment.


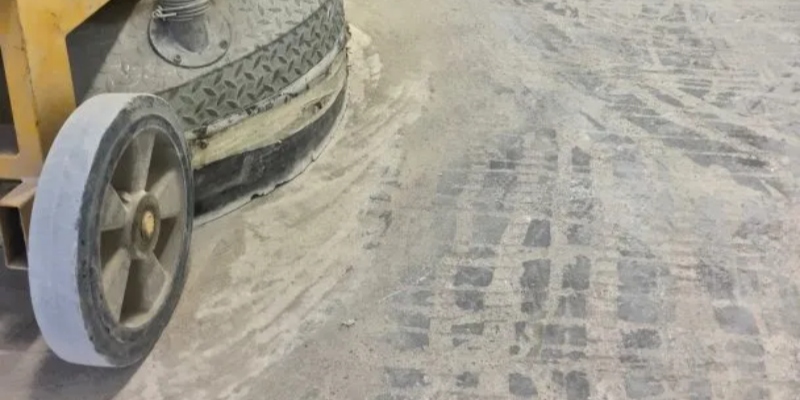
concrete floor coating removal


Application Differences in Real Projects

In real coating removal projects, PCD tools are typically used in the initial stage where fast removal is required. Once the main coating layer is removed, metal bond tools may be used to clean remaining residue and prepare the floor for the next grinding or polishing steps. This staged approach helps maintain efficiency while achieving a more consistent surface condition.


Conclusion

Overall, for coating removal applications, PCD tools are generally the more effective option due to their aggressive cutting action and higher removal speed. Metal bond tools, while not the primary removal solution, remain important for surface preparation and refinement after coating removal. In professional flooring work, using both tools in the correct sequence often delivers the best overall results.

READ MORE >

What Tool Should You Use for First Concrete Grinding Pass?

For the first grinding pass, it’s important to use an aggressive metal bond diamond grinding tool—one that fits the current condition of the concrete and the amount of material you need to remove. This initial step is mainly about opening up the surface, taking care of small imperfections, and establishing the right profile for the grinding stages that come next. If you pick the wrong tool at this point, it can slow down production, wear the tool faster, and leave uneven scratches that end up needing more grinding later.


Choosing the Right Tool for the Initial Grinding Stage

The first pass typically calls for a tool with strong grinding action, since the concrete surface may include uneven spots, weak top layers, old coatings, or other types of damage. With harder concrete, choosing the right bond formulation and diamond segment design helps keep cutting performance efficient. Softer concrete often needs different tooling characteristics to deliver the best results. Many professional contractors prefer metal diamond grinding heads during this stage because they remove material effectively and help create a consistent surface profile for subsequent refinishing.


Why Tool Selection Matters During the First Pass

The purpose of the first grinding pass isn’t to reach the final polished look—it’s to prepare the surface properly for what follows. If the tool is too fine, you may lose efficiency and spend more time working. On the other hand, using something overly aggressive can create deeper scratches that then require extra refinement. When choosing concrete grinding tools like NewGrind machine diamond tooling, you should consider factors like concrete hardness, surface condition, grinder weight, and the specific needs of the project.


concrete grinding project


Matching Diamond Tooling with the Right Grinding Equipment

TransGrind designs diamond tooling for professional floor preparation work, where consistent grinding performance and dependable tool compatibility are essential. In real job site conditions, contractors often need tooling that can perform well across different grinding platforms, including widely used systems such as Husqvarna, HTC, and SASE. When you match the diamond tool to the grinder setup and the concrete condition, you help ensure stable performance during the first pass and improve overall workflow efficiency.


Preparing the Surface for the Next Grinding Stages

After the first grinding pass has removed the unwanted material and produced a uniform surface profile, contractors can move on to the next refinement steps. Each following stage should be handled in a more controlled way, so scratches can be reduced gradually and the surface quality improves. Using the right diamond floor grinding shoes—or other compatible tooling—at each step helps you stay productive while minimizing unnecessary rework.


A successful concrete grinding project starts by selecting the right tool for the first pass. By assessing the floor condition, choosing suitable diamond tooling, and working through a controlled grinding sequence, contractors can create a stronger foundation for polishing and achieve more predictable results.

READ MORE >