What is a transformer core?

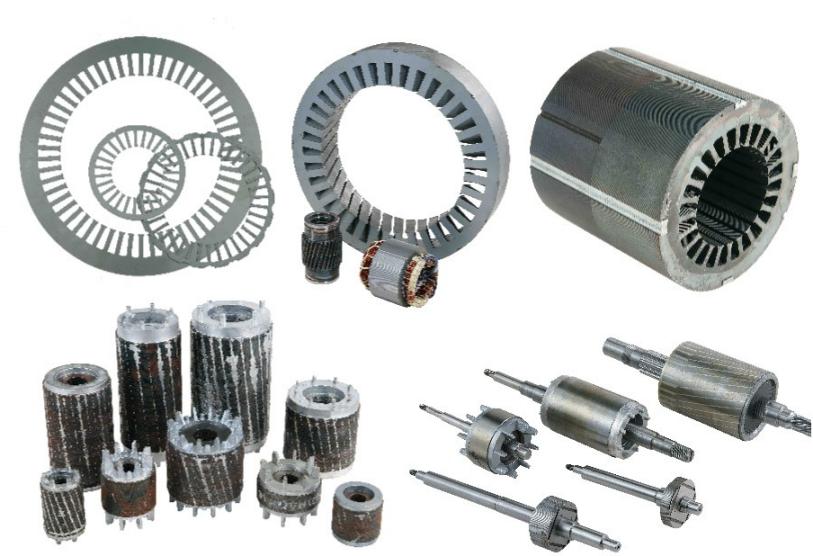
The transformer core is the core component of a power transformer. As the carrier of the magnetic circuit for electromagnetic induction, it directly affects the efficiency, volume and operational stability of the transformer. ​

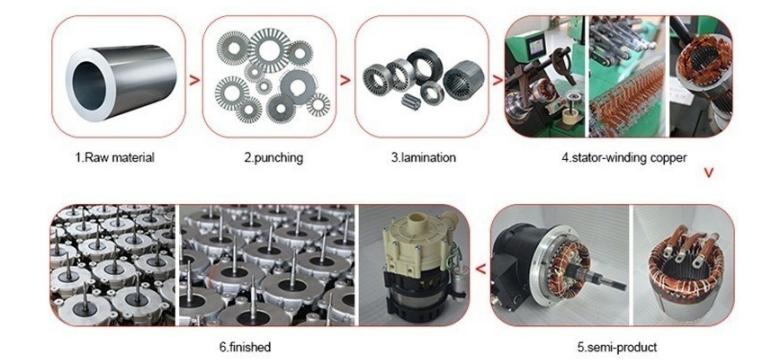
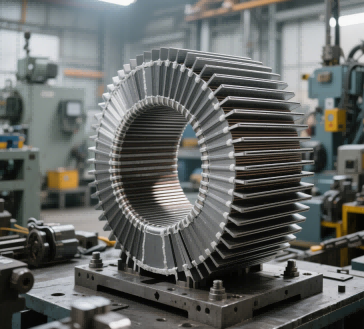
In terms of materials, modern transformer cores are mostly made by laminating silicon steel sheets (with a silicon content of approximately 3% to 5%). The addition of silicon can significantly increase the resistivity of iron and reduce eddy current losses - this is the useless power consumption caused by electromagnetic induction of current in the iron core. Silicon steel sheets are usually rolled into thin sheets of 0.3mm or 0.23mm. After being coated with an insulating layer on the surface, they are stacked layer by layer to further reduce the influence of eddy currents.

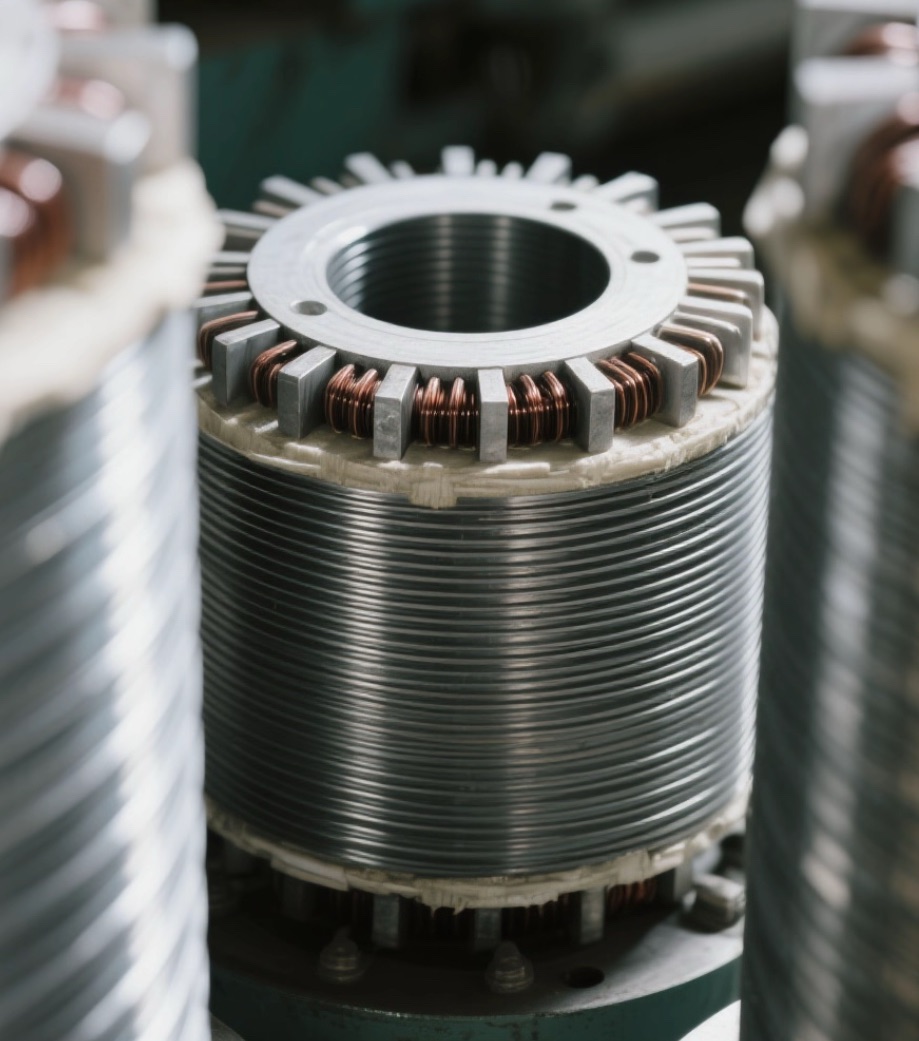
Its structure is divided into two types: core-type and shell-type. In the core-type, the windings of the core wrap around the core column and are mostly used in power transformers. Shell-type cores are wound around and are commonly found in small transformers. The geometric design of the core needs to be precisely calculated to ensure the unobstructed magnetic circuit and avoid magnetic saturation at the same time. ​

Efficient core design is the key to energy conservation in transformers. Nowadays, the application of new materials such as ultrafine crystalline alloys is driving cores towards lower losses and higher magnetic permeability, providing core support for the construction of green power grids.

READ MORE >

What is the core of a transformer made of?

The transformer core (also known as the magnetic core) is the central magnetic circuit component of a transformer. Its material selection directly affects the transformer's efficiency, losses, and applicable scenarios. Based on operating frequency, power requirements, and cost factors, core materials can be categorized into the following types:


1. Traditional Silicon Steel Sheets (Fe-Si Alloy):​​

Composition:

Cold-rolled steel sheets with silicon content ranging from 0.8% to 4.8% , typically with a thickness of  0.35mm or thinner​.

Characteristics:

High saturation magnetic induction (Bs≈1.6–1.7T), suitable for high-power scenarios at power frequencies (50/60 Hz).

Laminated stacking: Insulating coatings are applied between layers to reduce eddy current losses. However, losses increase significantly at high frequencies​.

Applications:

Primarily used in power transformers and motor cores for low-frequency, high-power electrical equipment.


2. Ferrite Core​

Composition:

Manganese-zinc (MnZn) or nickel-zinc (NiZn) ferrite, classified as sintered magnetic metal oxides.

Characteristics:

High resistivity: Significantly reduces eddy current losses at high frequencies, suitable for a ​frequency range of 1 kHz——1 MHz​ .

Low saturation flux density (Bs ≈<0.5T), weak DC bias capability, and prone to magnetic saturation.

Applications:

Widely used in electronic devices such as switch-mode power supplies (SMPS)​, ​high-frequency transformers, and inductors.


3. Metal Magnetic Powder Cores

Types:

Iron powder cores

Iron-silicon-aluminum powder cores (FeSiAl)

High-flux powder cores (HighFlux)

Molybdenum permalloy powder cores (MPP) .

Characteristics:

Strong anti-saturation capability: Reduces eddy currents through insulation-coated dispersed magnetic particles, making it suitable for DC superposition scenarios .

Medium permeability (μe≈10—125) with a frequency range of 10 kHz - 100 kHz​ .

Applications:

Widely used in medium-to-high-frequency power devices such as:

​PFC inductors (Power Factor Correction)

​Filter inductors.


4. Novel Alloy Materials​

Amorphous Alloys​

Composition:

Iron-based (e.g., Fe₈₀B₁₀Si₁₀) or cobalt-based amorphous ribbons, characterized by disordered atomic arrangement​ .

​Advantages:

​Ultra-low core losses (only 1/5 of silicon steel), enabling significant energy savings .

Limitation:

Significant magnetostriction (resulting in higher operating noise) .

​Applications:

Energy-efficient distribution transformers.


Nanocrystalline Alloys​

​Structure:

​Nano-scale crystalline grains (<50 nm) embedded in an amorphous matrix .

​Advantages:

​High permeability & low losses (superior to ferrites at 50 kHz) .

​Strong harmonic resistance and excellent thermal stability (operating range: -40–120°C) .

​Applications:

​High-frequency transformers and PV inverters​ .

​EV electric drive systems (e.g., integrated OBC/DC-DC modules)


Key Factors in Material Selection​

​Operating Frequency​

​Low Frequency (≤1 kHz) :

​Silicon Steel or Amorphous Alloys (e.g., Fe₈₀B₁₀Si₁₀).

High Frequency (>10 kHz) :

​Ferrite Cores (MnZn/NiZn) or Nanocrystalline Alloys.


Loss Requirements​

​Lowest Core Loss:

​Amorphous/Nanocrystalline Alloys.

High-Frequency Loss Optimization:

​Ferrites.


Cost and Process

​Cost-Effectiveness & Maturity:

Silicon Steel.

High Initial Cost with Long-Term ROI:

​Amorphous/Nanocrystalline Alloys.​


READ MORE >

Detailed explanation of the power and temperature range of heating cables Safe use guidelines

1. Heating Cable Power Range

Heating cable power is typically expressed in watts per meter (W/m). Common specifications are as follows:

Low-power cable: 10-20 W/m

Applications: Pipe insulation, soil frost protection (e.g., eaves snow melting), and low-temperature supplemental floor heating.

Features: Gentle heating, suitable for long-term continuous operation.


Medium-power cable: 20-30 W/m

Applications: Residential floor heating and bathroom heating.

Features: Balances energy consumption and heating efficiency; requires a thermostat.


High-power cable: 30-50 W/m

Applications: Industrial environments (e.g., factories and warehouses), rapid snow melting (driveways and ramps).

Features: Rapid heating; requires strict cable spacing to avoid overheating.


Power selection recommendations:

Calculate based on the application scenario and heat losses (e.g., room insulation and ambient temperature).

Residential applications typically consume between 15 and 25 W/m, while industrial applications may require higher power.


2. Temperature Range

Surface Operating Temperature:

Ordinary PVC-insulated cable: Maximum operating temperature approximately 65°C (higher temperatures may cause degradation).

High-temperature-resistant silicone/Teflon cable: Maximum operating temperature 150 to 200°C (industrial use).

Self-regulating temperature cable: Automatically adjusts temperature, typically maintaining a temperature between 40 and 85°C (thus eliminating the risk of overheating).


Ambient Operating Temperature:

Low-temperature type: -40 to 50°C (suitable for outdoor frost protection).

Standard type: -20 to 60°C (commonly used for indoor floor heating).


3. Safety Instructions

Installation Precautions:

Spacing: Cable spacing ≥ 5 cm (greater spacing for high-power cables) to avoid localized overheating.

Insulation Test: Before installation, use a megohmmeter to test the insulation resistance (≥ 1 megohm).

Avoid crossing: Cables must not overlap or bend, as this can cause heat buildup.


Temperature Control System Key Points:

Use a thermostat or smart thermostat and ensure the set temperature does not exceed the upper limit of the cable (for example, for floor heating, an ambient temperature of 28°C or less is recommended).

While self-regulating temperature cables are self-regulating, installing a thermostat is recommended to improve energy efficiency.


Environmental Restrictions:

Waterproof cable (IP67 or higher) must be used in humid areas (bathrooms, outdoors).

If buried or laid in concrete, ensure the cable sheath is corrosion-resistant and pressure-resistant.


Regular Maintenance:

Inspect the cable for damage and seals annually before use.

Unusual power consumption (such as a sudden increase in electricity bills) may indicate a cable failure.


Prohibited Actions:

Cutting constant current cables (disrupting resistance balance); self-regulating temperature cables can be cut if necessary.

Covering with carpet or furniture will hinder heat dissipation.


4. FAQs

Q: Will the heating cable leak electricity?

A: Certified products have reliable insulation, but damaged or poor-quality cables may leak electricity. A grounding system and a residual current device (RCD) are required.


Q: What should I do if the cables are heated unevenly?

A: Check the cable spacing, voltage stability, and correct thermostat sensor placement.


Q: Can I use this under parquet flooring?

A: Yes, but the surface temperature must be ≤ 27°C and the recommended power is ≤ 18W/m² to prevent the wood from drying out and cracking.

READ MORE >

Dealing with Dust Tools and Regulations in Surface Preparation

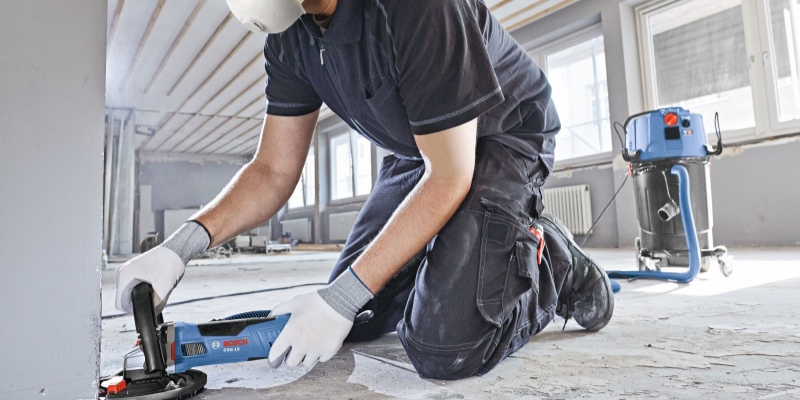
An essential component of surface preparation and floor restoration is dust management. If not controlled appropriately, fine dust particles produced by using a metal bond trapezoid grinding tool or by concrete PCD grinding tooling operations can be extremely dangerous to one's health and safety, regardless of whether one is operating in a home, business, or industrial setting. For contractors and site managers, breathing in airborne dust, particularly silica dust, can result in long-term lung problems and legal liabilities.


To effectively manage dust, it's essential to use the right tools. Modern surface preparation equipment often includes built-in dust collection systems or attachments for industrial vacuum systems. These tools help capture particles directly at the source, reducing their release into the environment. Wet grinding with HTC diamond grinding heads is another effective method, where water is used to suppress dust during the process.


Government requirements must be followed without exception. Permissible exposure limits for airborne pollutants on construction sites have been set by organizations like OSHA. Contractors should use authorized equipment, give workers personal protective equipment, and train employees on safe procedures as part of a dust management plan in order to achieve these regulations.


Effective dust management not only satisfies legal requirements but also enhances on-site cleanliness and visibility, enabling more accurate work and cutting down on cleanup time. In later phases of floor restoration, clean surroundings can help coatings and adhesives adhere more effectively.

READ MORE >

What Size Flapper for Toilet?


What Is a Toilet Flapper?


A toilet flapper is the flexible rubber valve that sits on top of the flush valve opening in your toilet tank. It’s connected to the flush handle or button by a chain. When you flush, the flapper lifts, allowing water to rush from the tank into the bowl. After the flush, it drops back into place to seal the valve and let the tank refill.


If the flapper doesn’t seal tightly — which is a common issue referred to as a toilet flapper valve not sealing — water will continue to leak into the bowl, wasting water and increasing your utility bill.


Why Flapper Size Matters


Getting the correct size flapper is more important than most people realize. An oversized flapper may not sit flush with the flush valve opening, causing it to leak. On the other hand, a flapper that’s too small might not cover the valve entirely, or may shift out of place. Either case leads to a poor seal and can cause problems like inconsistent flushing or continuous running water.


In short, the wrong size flapper can lead to:


  • Weak or partial flushes


  • Higher water bills


  • A constantly refilling tank


  • Toilet flapper valve not sealing


Common Toilet Flapper Sizes


There are three main categories when it comes to flapper sizes:


1. 2-Inch Toilet Flapper


This is the most common size used in standard toilets, especially older or traditional models. If you're unsure, there's a good chance your toilet uses a 2-inch flapper.


2. 3-Inch Toilet Flapper


Larger flush valves (often found in newer high-efficiency toilets) use 3-inch flappers. These allow for a more powerful flush using less water, which makes them popular in brands like Kohler and TOTO.


3. Specialty or Custom Flappers


Some toilets use uniquely shaped or branded flush valve systems that require a specific flapper size or structure — such as flappers with wings, floats, or hard plastic designs.


How to Tell What Size Flapper You Need


There are several ways to determine the right flapper size for your toilet:


Method 1: Measure the Flush Valve Opening


Use a ruler or caliper to measure the inside diameter of the flush valve seat:


  • Around 2 inches (50mm) → You need a 2-inch flapper


  • Around 3 inches (76mm) → You need a 3-inch flapper


Method 2: Check the Manufacturer’s Label or Manual


Look inside the toilet tank lid or on the brand’s website. Most manufacturers will list the flush valve size, especially if it’s a selling point like “3-inch flush valve for better performance.”


Method 3: Visual Comparison


If you don’t have tools handy, use this general guide:


  • If the flush valve opening looks about the size of a golf ball, it’s likely a 2-inch flush valve


  • If it’s closer to the size of a tennis ball, it’s likely a 3-inch flush valve
READ MORE >

Concrete Grinding for Paint Prep Laying the Groundwork for a Flawless Finish

Properly preparing the surface is crucial for achieving a durable and high-quality paint finish on concrete floors. One of the most effective ways to prepare concrete for painting is through grinding. This technique not only removes old coatings, adhesives, and surface flaws but also creates the perfect texture for new paint to adhere effectively. Neglecting this step can result in issues like peeling, flaking, or premature deterioration of the new finish.


Concrete grinding employs specialized concrete floor diamond grinding tooling to smooth and level the surface. These tools effectively open the pores of the concrete, allowing for better penetration and bonding of primers and paints. Additionally, grinding removes contaminants such as oil, grease, or dirt that could hinder the adhesion of coatings. By starting with a clean, mechanically prepared surface, painters can achieve better coverage and longer-lasting results.


Selecting the appropriate equipment is crucial. Metal bond diamond grinding tools are often preferred for their durability and efficiency, particularly on hard concrete. For projects that involve removing coatings, tools like HTC EZ change PCD tools or aggressive 5 inch diamond grinding wheel can effectively strip away epoxy or old paint layers with minimal damage to the concrete. Choosing the right tool for the surface condition ensures a uniform finish and saves time during preparation.


concrete floor diamond grinding tooling


Dust control is also an important consideration during the grinding process. Utilizing vacuum systems with the grinder helps reduce airborne dust, leading to a cleaner work environment and improved visibility. This not only safeguards workers but also prevents fine dust from settling on freshly ground surfaces, which could compromise paint adhesion.


Whether for residential garages or large commercial spaces, concrete grinding is a cost-effective and dependable method for preparing floors for painting. It enhances durability, improves aesthetics, and decreases maintenance needs over time.


TransGrind Diamond Tools is a leading manufacturer and supplier of high-quality diamond grinding tools. Our products are designed for optimal performance, durability, and precision, ensuring excellent results in grinding and polishing applications. To discover our extensive range of products, please visit us at www.transgrindtools.com.

READ MORE >

Does a new toilet include flush valve ?


When buying a new toilet, many consumers ask the same question: Does the toilet come with a flush valve included? Understanding this can help you avoid buying unnecessary parts and ensure your toilet is ready to install and use right out of the box.


What Is a Toilet Flush Valve?


A toilet flush valve is a critical component inside the toilet tank. It controls the flow of water from the tank into the bowl during flushing. A typical flush valve for toilet includes an overflow tube, a sealing component (like a flapper or sealing), and a connection to a flush button or handle.


Does a New Toilet Come with a Flush Valve?


Yes. Whether it's a one-piece toilet, a two-piece toilet, or a toilet with a concealed tank, manufacturers usually include a toilet flush valve as a standard part of the package. It’s part of the toilet’s certified structure and function, and most brands ship their toilets as complete sets with all internal components pre-installed or included.


This ensures the toilet can be installed and used without the buyer needing to purchase extra parts like a toilet flush valve replacement.


When Do You Need to Buy a Flush Valve Separately?


In some cases, you may still need to purchase a flush valve for toilet separately:


  • You intentionally buy a toilet that includes only the ceramic components, with no internal tank fittings;


  • You want to upgrade or customize the system, for example, changing to a dual flush toilet;


  • The flush valve in your old toilet is broken and needs replacing;


  • You’re building a custom setup using a non-standard water tank.


How to Know If a Toilet Includes a Flush Valve?


  • Check the product description or manual – Most listings will specify whether internal tank parts are included;


  • Ask the seller or manufacturer – This is especially important when buying from online or B2B platforms;


  • Look at product images or unboxing videos – Some brands show the inside of the tank to indicate what's included.


Conclusion


There’s no one-size-fits-all answer to whether a new toilet includes a flush valve. It depends on the toilet type and how it’s being sold. To avoid any installation surprises, always double-check what's included in the box before making a purchase. If you’re still unsure about choosing the right toilet flush valve, feel free to reach out to a professional supplier for guidance.

READ MORE >

How Do Push Button Toilets Work?


Push button toilets are a modern upgrade to the traditional lever-flush models. They're sleek, easy to use, and help save water — which makes them super popular in today’s bathrooms. But have you ever wondered what actually happens when you press that button? Let’s take a closer look at how push button toilets work, and what’s going on behind the scenes.


1. What Is a Push Button Toilet?


A push button toilet is exactly what it sounds like — instead of pulling a handle, you press a button to flush. The button is usually located on the top or side of the tank, and it connects to an internal flush valve that releases water when activated.


How Is It Different from Traditional Handle Toilets?


  • Looks more modern and neat


  • Easier to use — just a simple press


  • Often comes with dual flush buttons to save water


  • Works great with concealed or one-piece toilet designs


2. Common Types of Push Button Flush Mechanisms


Not all push buttons work the same way. There are actually four common types of mechanisms that connect the button to the flush valve:


Lever-Driven


When you press the button, it lifts a lever inside the tank. That lever is attached to a chain, which pulls open the flapper (or flush seal) and lets water rush into the bowl.


push button toilet

Rod-Press


This type uses a rod directly under the button. When pressed, the rod pushes down on the flush valve’s top button, triggering the flush.


flush valves top button


Cable-Control (Wire Pull)


This one uses a thin wire inside a plastic tube. Pressing the button pulls the cable, which opens the flush valve. It's flexible and great for side-mounted or custom installations.


Round Push Button Toilet Flush


Air-Driven (Pneumatic)


Here, the button is connected to the flush valve via an air tube. When you press the button, it sends air pressure through the tube, which then opens the valve. This setup is often used in concealed tank toilets.


Round Toilet Push Button Handle


3. How the Flushing Process Works


Even though there are different mechanisms, the basic idea is the same. When you press the button, you're triggering the flush valve to release water from the tank into the bowl. Here's how each one works:


Lever-Driven: Button lifts the lever → lever pulls the chain → chain lifts the flapper → water rushes out


Rod-Press: Button presses down → rod hits the flush valve button → valve opens


Cable-Control: Button pulls the cable → flush valve opens


Air-Driven: Button pushes air → air activates flush valve → water flows out


After flushing, the valve closes, and the fill valve refills the tank, getting ready for the next flush.

READ MORE >

How Does a Basin Overflow Hole Work?


1. What’s a Basin Overflow Hole?


A basin overflow hole is a built-in safety feature that helps stop your sink from overflowing. You’ll usually find it near the top edge of the basin, either facing the user or close to the faucet. It can be round, oval, or even rectangular in shape. While it might not grab your attention at first glance, it plays a big role when something goes wrong—like when someone forgets to turn off the tap.


2. How Does It Work?


Basins with overflow holes typically use a double-layer ceramic structure. Inside that structure, there’s a hidden channel. When the water level rises and reaches the overflow hole, the excess water flows into this inner passage and drains out from the bottom, where it connects with the main drain. It’s a smart design that quietly protects your bathroom from flooding.


3. Why It Matters


The biggest advantage of having an overflow hole is peace of mind—it helps prevent water damage in case the faucet is left running. Plus, the overflow hole also improves drainage efficiency by allowing air into the pipes, which helps water drain faster from the main outlet. For families with kids or seniors, or just anyone who wants a safer bathroom setup, it’s a small feature that makes a big difference.


4. Common Issues and How to Maintain It


Overflow holes can get clogged over time with soap scum, dirt, or even hair. If that happens, they won’t work properly when you need them most. It’s a good idea to clean them regularly using a slim cleaning brush or pipe cleaner. Also, many basins come with a removable overflow cover, so you can swap it out if it gets worn or if you want a new look.


5. Final Thoughts: Do You Need One?


Overflow holes aren’t essential for every sink, but they’re definitely useful. If you go with a basin that has an overflow, make sure to pair it with a pop-up drain with overflow—that’s a drain specifically made to work with this kind of sink. Also, these basins are often thicker than standard ones, so you’ll need a drain with a longer threaded body (at least 7 cm) to make sure everything fits securely. Choosing the right combination gives you both style and safety.

READ MORE >

How to flush a toilet when the handle is broken ?


The toilet is one of the most frequently used fixtures in any bathroom. After long-term use, it’s not uncommon to encounter broken components—like a flush handle that no longer works because the internal mechanism has snapped. While this might seem frustrating, there’s no need to panic. With a few simple tricks, you can still flush your toilet without the handle and keep your bathroom clean and functional.


Here are some quick and practical ways to flush your toilet when the handle is broken.


Step 1: Understand How the Toilet Handle Works


The flush handle might look like a small part, but it’s actually the trigger of the entire toilet flushing system. It’s connected to a lift rod or chain inside the tank. When you press the handle, it pulls up the toilet flush valve flap or canister, allowing water to rush from the tank into the bowl to flush waste away.

Understanding this mechanism will help you operate it manually when the handle stops working.


Step 2: Three Manual Flushing Methods You Can Try


1. Pull the Chain Inside the Toilet Tank


First, remove the toilet tank lid. You’ll see a chain connecting the handle to the flush valve—this chain might be plastic or stainless steel.

Gently pull the chain upward with your hand. This action opens the flush valve and lets the water flow into the bowl, effectively flushing the toilet. Once flushing is complete, simply release the chain and let it drop back into place.

This is the most straightforward temporary solution. Just be careful not to yank too hard, as excessive force can damage the flush valve or break the chain.


2. Lift the Flapper or Canister Directly


If the handle stopped working because the chain snapped (which often happens with plastic chains), then method one may not work. In that case, you can manually lift the toilet flapper or canister directly by hand.

Lifting it fully will open the flush valve and allow water to exit the tank. Once the flush is complete, gently lower the flapper back into place. Be careful not to let the broken chain fall into the drain hole—this could prevent the flapper from sealing properly and cause the toilet to leak.


3. Use a Bucket to Flush the Toilet


If you don’t want to mess with the tank at all, here’s a traditional approach: flush with a bucket of water.

Fill a bucket with about 6 liters (or 1.5 gallons) of water—that’s approximately the full flush volume of most toilets. Quickly pour the water into the bowl from a height, aiming for the drain hole. This creates a forceful rush of water that mimics the effect of a regular flush and clears the waste.

Pour quickly but carefully to avoid splashing dirty water, and make sure to pour directly into the center of the bowl for the best results.


Step 3: What to Do After the Temporary Fix


While the above methods are great for emergencies, they’re not permanent solutions. Manually opening the tank every time is inconvenient and can potentially damage internal components.

You should replace the toilet handle as soon as possible. Many universal toilet tank levers are available online—Amazon has a wide selection to choose from. If you're not confident about installing one yourself, consider hiring a plumber.

You can also check out our website, where we provide video tutorials on how to install different types of toilet flush handles.


Final Thoughts: Don’t Panic When the Handle Breaks


A broken toilet handle isn’t the end of the world. Once you know the right tricks, you can flush your toilet just fine and keep everything hygienic until a repair is done.

Regularly inspect your toilet’s internal components to catch small issues before they turn into big problems. And if you're in need of quality toilet replacement parts, feel free to explore our product page for handles, valves, and more.

READ MORE >