How do toilet flush valves work ?


Toilet flush valves may seem simple, but they play a vital role in ensuring your toilet flushes properly and efficiently. Whether you're replacing a worn-out valve or trying to understand how different systems work, knowing how a flush valve operates can help you make better choices for your bathroom. This article explains the components, operation principles, types, and common issues of flush valve for toilets, especially focusing on manual toilet flush valve systems and the common 2 inch toilet flush valve and 3 inch toilet flush valve specifications.


1. Key Components of a Toilet Flush Valve


A typical toilet flush valve assembly includes three main parts:


  • Float Mechanism: This controls when the valve opens and closes.


In single flush lever toilets, the float is usually built into the lid mechanism.


In dual-flush toilets, the float mechanism is inside the valve body and operates via a buoyant float cup or bucket.


  • Control Device: This includes the flush handle or button. Pressing this component activates the flush mechanism, initiating water release.


  • Outlet (Flush Opening): This part is opened by the control device, allowing water to flow from the tank to the bowl. Once the float detects low water, it triggers the outlet to close.


2. How a Toilet Flush Valve Works


Fill Phase:


After a flush, the flush valve for toilets remains tightly sealed. Water enters the tank and fills up to a preset level.


Flush Phase:


When the manual toilet flush valve is activated (via handle or button), the outlet opens. Water rapidly exits the tank and enters the bowl, completing the flush. As the water level drops below the float position, the float causes the flush valve to seal again, preventing further water release.


3. Common Types of Toilet Flush Valves


  • Single-Flush Lever Valve: Utilizes a lever and chain to lift a flapper or lid, allowing water to drain from the tank. Commonly paired with a 2 inch toilet flush valve.


  • Dual-Flush Button Valve: Operated by two buttons (typically on top of the tank) that control a bucket-style valve. One button initiates a full flush, the other a half flush. These often use 3 inch toilet flush valve designs for better water efficiency.


  • Cable-Operated Flush Valve: Similar to dual-flush models, but with a flexible control cable. This type offers installation flexibility for top or side-mounted buttons.


4. Common Issues and Fixes


  • Leaking Water: Caused by worn seals or debris. Cleaning or replacing the gasket usually solves the problem.


  • Incomplete Flushing: If the flush is weak, check if the valve is partially stuck and the flush valve for toilets isn't fully opening.


  • Slow Refill or Blockages: Minerals or debris in the valve or supply line can reduce flow. Clean or replace as needed.


5. Maintenance and Replacement Tips


Regularly check the flush valve for signs of wear or mineral buildup.


Know your valve size before replacing. Most standard toilets use either a 2 inch toilet flush valve or a 3 inch toilet flush valve, so be sure to measure before buying.


Conclusion


Understanding how a manual toilet flush valve works helps homeowners maintain their bathrooms more efficiently. With the right type and size—whether it's a 2 inch or 3 inch toilet flush valve—you can ensure effective flushing performance while conserving water. Regular inspection and timely replacement of your flush valve for toilets will help avoid leaks, clogs, and unnecessary water waste.
READ MORE >

How often to replace toilet flapper ?


Have you ever noticed your toilet making constant dripping sounds? Or maybe your flush isn’t as strong as it used to be? Or worse—your water bill suddenly went up for no reason?

Well, don’t panic—it might not be a serious plumbing issue. In many cases, it’s just your toilet flapper acting up!


This small rubber part plays a big role in your toilet’s flushing system. So let’s answer the question: how often should you replace your toilet flapper?


What Is a Toilet Flapper?


In simple terms, the toilet flapper is a rubber seal inside the tank that controls the flow of water into the toilet bowl.

When you press the flush button or handle, the flapper lifts up, allowing water to rush into the bowl. Once the tank is empty, it drops back down to seal the tank so it can refill.


Over time, the flapper can get worn out, warped, or cracked—causing leaks or weak flushes.


How Long Does a Toilet Flapper Last?


In most homes, a flapper lasts around 3 to 5 years. Not bad, right? But this depends on a few things:


  • Water quality – Hard water or water with chlorine can wear out PVC faster


  • Usage – The more often your toilet is used, the faster the flapper wears down


  • Material – Rubber flappers tend to last longer than PVC ones


So even if it’s still “working,” it’s a good idea to check it regularly and replace it if needed.


Signs You Need to Replace Your Toilet Flapper


Not sure if your flapper needs replacing? Here are some clear signs to watch out for:


  • Your toilet keeps running – That constant water sound means the flapper isn’t sealing properly.


  • Weak or incomplete flushes – If flushing isn’t doing the job, the flapper may not be opening fully.


  • Water leaking into the bowl – Look closely: if water keeps trickling even when the toilet hasn’t been flushed, it’s probably the flapper.


  • Visible wear and tear – Take off the tank lid and look at the flapper. If it looks cracked, warped, or sticky, it’s time for a new one.


A faulty flapper can waste hundreds of gallons of water per month—so it’s not just a small problem!


How Often to Replace Toilet Flapper?


So, back to the main question: how often should you replace your toilet flapper?


The general rule is every 3 to 5 years. But that’s just a guideline. Here’s when you should consider replacing it more frequently:


  • If you live in an area with hard water or chlorinated water


  • If your toilet is used heavily, like in a large household or a public restroom


  • If you notice any of the signs mentioned above


Including flapper checks in your regular toilet maintenance routine is a smart move. It’s a small part, but it can prevent big headaches—and high water bills.


Conclusion


Your toilet flapper may be small, but it plays a huge role in keeping your bathroom running smoothly and your water bills under control.

By replacing it every few years—or sooner if needed—you can avoid leaks, save water, and keep your flush strong and reliable.

READ MORE >

How to change a toilet flush button ?


When your push button toilet starts acting up—whether the button sticks, doesn't rebound, or causes continuous flushing—it might be time for a buttons replacement. Replacing a toilet flush button may sound like a hassle, but it's actually a simple process that most people can do themselves with minimal tools.


Why Replace a Toilet Flush Button?


Over time, flush buttons can wear out or become less responsive. This can lead to poor flushing performance, water waste, or even a broken flush valve button. Replacing the button can restore proper flushing and give your dual flush toilet tank a longer life.


Preparation Before Replacement


You only need a few tools like a wrench and a cloth. Before you begin, identify how the button is fixed in place. There are three common types:

  • Buttons fixed on the push button flush valve
  • Buttons mounted on the toilet tank lid
  • Buttons mounted on the wall or front panel (common in concealed tanks)

You’ll also need to purchase a replacement that matches your existing setup. Make sure to check if it’s a single or two button toilet design, and ensure the button diameter fits your existing opening.


Replacement Steps by Button Type


1. Buttons Fixed on the Flush Valve


These are the simplest to replace.

  • No need to open the tank lid. Just twist the old button to unscrew it from the valve.
  • Insert the new button into the hole and tighten it by turning.
  • This type not only simplifies installation but also helps hold the lid in place securely.


2. Buttons Mounted on the Tank Lid


  • First, remove the lid. If it’s a cable-operated system, press the release clips on the control box to detach it from the button.
  • Unscrew the nut securing the button to the lid and remove the old unit.
  • Insert the new button through the hole, reconnect the rod or cable, and tighten the nut.
  • If the rod is too long and interferes with flushing, trim it with a utility knife.
  • Replace the lid and test the button for smooth operation.


3. Buttons Mounted on the Wall or Tank Panel


  • These are typically found on concealed or in-wall dual flush toilet tank systems.
  • Start by removing the faceplate or cover.
  • Detach the control box or rods from the old button.
  • Unscrew the mounting nut and remove the button module.
  • Insert the new button into the hole, secure it with the nut, and reconnect the control mechanism.
  • Reattach the faceplate and press both buttons to test flush performance.


Common Issues & Troubleshooting


  • Loose buttons after installation: Ensure the nut is tightened securely and that any gaskets are in place.
  • One of the flush options not working: Adjust the cable or rod length to ensure proper engagement with the flush valve.
  • Not sure what button to buy? Choose universal models that match your push button toilet setup in terms of diameter and function.


Conclusion: You Can Do It!


Changing your toilet’s flush valve button is one of the easiest home maintenance tasks. With just a few steps and a proper replacement, your push button toilet will be working like new again. Whether you have a two button toilet or a single-button setup, Jielin offers a range of high-quality buttons for easy replacement.


Need help choosing the right model? Visit our product page to explore our full catalog, complete with specs, images, and installation videos.

READ MORE >

How to install toilet tank lever ?

1. Introduction


A toilet tank lever is a crucial component of the flushing system, responsible for lifting the flush valve and allowing water to flow from the tank into the bowl. Over time, it may need replacement due to wear and tear or aesthetic upgrades.


Why Replace a Toilet Tank Lever?


There are two main reasons why you might need to replace your toilet tank lever:

  1. Plastic Component Breakage – The internal plastic parts of the flush lever can break due to prolonged stress, making it impossible to flush properly.
  2. Bathroom Style Upgrade – When remodeling a bathroom or updating fixtures, you may need a new lever that matches the overall style, such as switching to black, chrome, or brushed nickel finishes.


2. Tools and Materials Needed


Before starting, gather the necessary tools and replacement parts:

  • New Toilet Tank Lever – Before purchasing, ensure you check:

    1. Installation Type – Front-mount or side-mount lever.
    2. Handle Material – Plastic or zinc alloy.
    3. Rod Material – Plastic, aluminum, or brass.
  • Adjustable Wrench or Pliers – Some toilet levers have nuts that may become difficult to remove due to prolonged use. In such cases, a wrench or pliers can help loosen the nut effectively.


3. Step-by-Step Installation Guide


Step 1: Turn Off the Water Supply

Locate the water supply valve near the base of the toilet and turn it off to prevent accidental flushing during the installation.

Step 2: Remove the Toilet Tank Lid

Carefully lift the tank lid and set it aside in a safe place to prevent it from cracking or breaking.

Step 3: Disconnect the Old Lever

  1. Unhook the flush chain from the lever arm.
  2. Use your hand or an adjustable wrench to loosen the mounting nut. Be aware that some levers have reverse-threaded nuts (turn clockwise to loosen).
  3. If the nut is stuck due to mineral buildup, use pliers or a wrench for extra leverage.
  4. Once the nut is loose, remove the old lever and clean any debris from the hole.

Step 4: Install the New Lever

  1. Insert the new lever through the tank hole, ensuring the handle is positioned correctly for comfortable use.
  2. Secure it by tightening the mounting nut (counterclockwise if it has reverse threading). Be careful not to overtighten, as it may crack plastic parts.

Step 5: Reconnect the Flush Chain

To ensure proper flush function, follow these steps when adjusting the chain length:

  1. Let the chain hang naturally without lifting the flush valve cover.
  2. Align the chain with the natural resting position of the flush lever rod hole.
  3. Mark the ideal chain position and move the hook to that spot.
  4. Attach the hook securely into the lever rod hole.

This method ensures that the flush valve can fully open and close without resistance.

Step 6: Test the Installation

  1. Turn the water supply back on.
  2. Flush the toilet multiple times to check if the new lever operates smoothly.
  3. If the flush isn’t working correctly, adjust the chain length again to ensure the flush valve opens fully.


4. Common Installation Issues and Fixes


Issue Possible Cause Solution
The lever is stuck or hard to press The nut is too tight, or the lever angle is incorrect Slightly loosen the nut and adjust the angle
The flush chain is too loose or too tight Incorrect chain length Adjust the hook position to match the lever’s resting state
Water keeps running after flushing The flush valve is not closing properly Check the lever and flush chain positioning; readjust if necessary
The new lever doesn’t match the bathroom style Wrong finish or material Choose a lever that complements the bathroom decor, such as black, chrome, or brushed nickel


Replacing a toilet tank lever is a simple DIY task that takes just a few minutes. By choosing the right lever style and following the correct installation steps, you can:

  • Ensure proper flushing functionality
  • Enhance the aesthetic appeal of your bathroom
  • Prevent future flushing issues with correct chain adjustment

For long-term performance, regularly check and maintain the flush handle and chain. If any parts become worn or broken, replace them promptly to keep your toilet in top condition.

READ MORE >

How to remove a concealed cistern panel ?


To remove a concealed cistern panel (commonly part of an in-wall toilet system), follow these steps based on repair guides and installation manuals from multiple sources:


Step 1: Identify the Panel Type

Concealed cistern panels vary by design:

Push-button panels: The flush button often doubles as a removable cover. Some models require twisting or prying the button out.

Flat panels: Look for hidden screws, clips, or adhesive seals around the edges.


Step 2: Prepare for Safe Removal

Turn off the water supply: Locate the shut-off valve near the cistern or main water line to prevent leaks.

Empty the cistern: Flush the toilet to drain water. Use a sponge or towel to remove residual water if needed.


Step 3: Remove the Flush Button or Cover

For push-button systems:

Press and hold the button, then twist counterclockwise or pry it out with a flathead screwdriver (insert into side grooves).

Some models require lifting the button upward while gently pulling.

For screw-fixed panels: Remove decorative caps (if present) to expose screws, then unscrew them.


Step 4: Detach the Panel

Unclip or unscrew:

Clip-fastened panels: Insert a plastic pry tool or flathead screwdriver into the gap between the panel and wall. Gently lever outward to release clips.

Adhesive-sealed panels: Slice through silicone or caulk with a utility knife to avoid damaging the wall.

Lift carefully: Once clips/screws are removed, tilt the panel slightly and lift it away from the wall. Avoid forcing it, as internal components (e.g., flush valve, fill valve) may still be connected.


Step 5: Access Internal Components

After removing the panel:

Inspect and repair parts like the flush valve, fill valve, or water supply lines.

Reassemble by reversing the steps, ensuring clips/screws are securely fastened and seals are intact.


READ MORE >

How to remove sink overflow ring ?


1. Identify the Fastening Mechanism

Most overflow rings are secured by screws or a clamping mechanism. For modern designs, look for a small screw (often hidden) that clamps the ring to the sink body. If the ring is plastic, it might be held in place by a threaded plastic nut underneath the sink.


2. Remove the Drain Assembly (If Necessary)

Disconnect the drainpipe beneath the sink to access the overflow components.

Use a wrench or pliers to loosen the locking nut connecting the drain to the sink. This step may require removing the entire drain assembly to reach the overflow ring.


3. Loosen the Overflow Ring

For screw-fastened rings: Locate the screw (often on the underside of the sink) and use a screwdriver to remove it. If the screw is corroded, apply penetrating oil (e.g., WD-40) to loosen it.

For threaded rings: Use a pipe wrench or adjustable pliers to grip the ring and turn it counterclockwise. If its stuck, tap gently with a rubber mallet to break the seal.


4. Address Sealant or Adhesive

If the ring is sealed with plumbers putty or silicone, carefully scrape away the residue with a utility knife or putty knife to avoid damaging the sink surface. 

5. Check for Hidden Clips or Gaskets

Some overflow rings have a rubber gasket or spring clip securing them. Remove the clip or pry out the gasket with a flathead screwdriver. 

6. Clean and Inspect

Once removed, clean the overflow hole and inspect the ring for damage. Replace any worn-out seals or gaskets to prevent future leaks.


READ MORE >

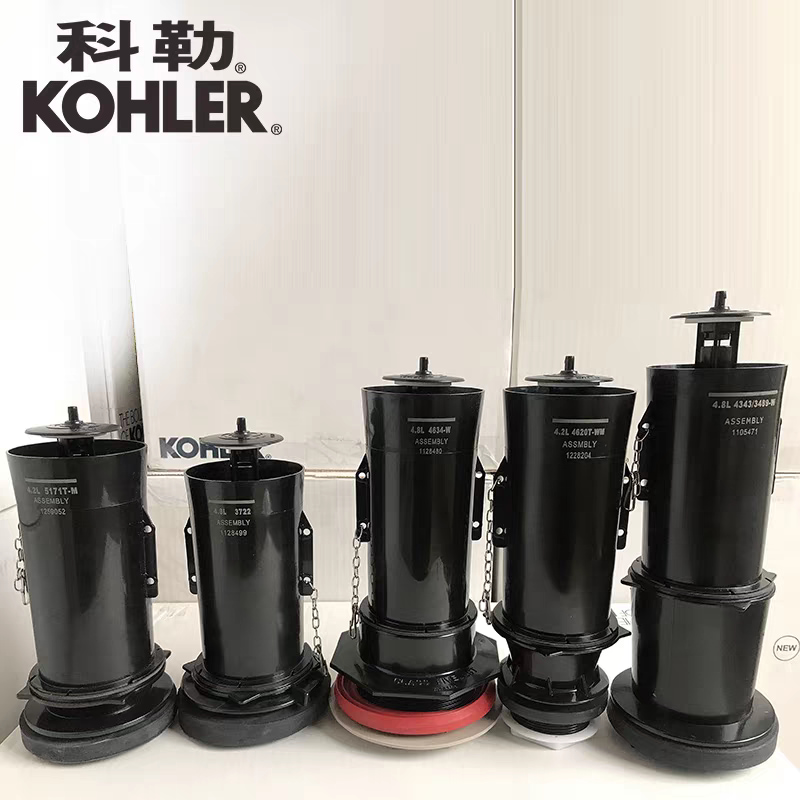
How to replace a flush valve on a kohler toilet ?


Kohler toilets are known for their design and reliable performance, but like all plumbing components, some parts eventually wear out. One of the most common issues is a faulty flush valve. Whether you're dealing with a leak, a weak flush, or a constantly running toilet, replacing the flush valve can restore proper function. This guide will walk you through how to replace a flush valve on a Kohler toilet — whether it's the entire valve or just the inner canister — with tips on choosing the right parts based on your model and the types of toilet flushing systems.


1. Introduction


The flush valve controls how water exits the tank and enters the bowl. Over time, the valve may wear out, leading to water waste or inefficient flushing. This post focuses on Kohler toilet flush valves, particularly the 2-piece models, and will help you assess the issue, select the right part, and install it step by step.


2. Preparation Before Replacement


A. Diagnose the Issue


Before buying a new part, determine whether the entire flush valve is damaged or only the canister (also called the float or tower) needs replacement. If the tank structure is fine and only the center bucket is worn or cracked, you can save time and money by buying a flush valve repair kit.


B. Identify the Right Model


Kohler offers a wide range of valves, including the 3 inch toilet flush valve used in many of their modern models. Each flush valve dimension is typically matched to specific toilet models. Using the wrong size or type may lead to leaks or incompatibility. Always check the model number stamped inside the tank or refer to your toilet manual for an exact match. This is especially important for Kohler two piece toilet flush valve replacement tasks.


C. Tools You'll Need


Adjustable wrench, Screwdriver, Towel or sponge, Replacement flush valve or canister, Rubber gloves (optional)


D. Safety First


  • Turn off the water supply


  • Flush the toilet to empty the tank


  • Disconnect the refill tube and chain from the flush lever


3. Installation Guide


Depending on your diagnosis, choose one of the following methods:


A. Full Flush Valve Replacement


When to choose: Cracked base, constant leaks, or worn-out sealing surfaces.


Removal Steps:


  • Remove the tank lid and place it aside


  • Disconnect the refill tube


  • Unhook the chain from the flush lever


  • Use an adjustable wrench to loosen the large plastic nut underneath the tank


  • Lift the entire flush valve out and clean the tank bottom


Installation Steps:


  • Insert the new flush valve into the tank hole


  • Tighten the mounting nut from below


  • Reattach the refill tube and flush chain


  • Ensure everything is secure and aligned


B. Replacing Only the Canister (Bucket)


When to choose: The tank and base are fine, but the canister is leaking, warped, or sluggish.


Removal Steps:


  • Remove the tank lid


  • Disconnect the refill tube and flush chain


  • Grip the canister’s crossbar and rotate counterclockwise to unlock it from the base


Installation Steps:


  • Align the new canister’s notches with the base slots


  • Rotate clockwise to lock in place


  • Reattach the chain and refill tube


This is one of the easiest forms of flush valve repair kit usage and avoids tank removal entirely.


4. Testing and Adjustment


  • Turn the water supply back on


  • Let the tank fill and observe any leaks around the base


  • Perform several flushes to ensure smooth operation


  • Adjust chain length if the flush is too weak or the flapper doesn’t seal properly


5. Conclusion


Replacing a flush valve may sound technical, but with the right tools and guidance, it’s a straightforward task. Whether you're dealing with a Kohler two piece toilet flush valve replacement or simply swapping the flush valve repair kit components, proper installation ensures water efficiency and a reliable flush every time.


Always confirm your flush valve dimension and type before buying, as Kohler models vary widely among different types of toilet flushing systems.

READ MORE >

How to replace toilet fill valve?

The toilet is one of the most frequently used fixtures in any household, and the toilet fill valve is a key component that controls the water refilling process inside the tank. When problems such as slow filling or constant running occur, a faulty toilet fill valve is often the cause.


While it might seem like a job for a plumber, replacing a toilet fill valve is a fairly simple DIY task. It can save you time and money, and also gives you a better understanding of your home’s plumbing system.


In this guide, we'll walk you through the complete process of removing the old toilet fill valve, installing a new one, and adjusting water levels—so you can easily handle this home maintenance task yourself.


 Tools and Materials Needed


Before you begin, gather the following tools and materials to ensure a smooth installation:


a. Adjustable wrench or pliers – For loosening and tightening the locknut underneath the tank.


b.Bucket or towel – To catch any residual water that may leak during disassembly.


c. New toilet fill valve – Choose a compatible model, preferably a universal type with adjustable height. Make sure the universal toilet fill valve inlet matches your supply hose connector: 

  • Europe & Africa: G3/8"
  • Middle East: G3/8" or G1/2"
  • Asia & South America: G1/2"
  • Peru: G7/8" or 15/16-14NPSM
  • North America: 15/16-14NPSM


Preparation


To avoid spills and ensure safety, follow these steps before removing the old valve:


Step 1: Turn off the water supply

Locate the shut-off valve near the toilet and turn it clockwise until it stops.


Step 2: Flush to empty the tank

Hold down the flush lever or button to drain as much water as possible from the tank.


Step 3: Place a bucket or towel under the tank inlet

This will catch any remaining water when you disconnect the supply hose.


Step 4: Disconnect the water supply hose

Use your hand or a wrench to loosen the hose from the base of the fill valve.


Removing the Old Toilet Fill Valve


Now you're ready to remove the existing valve:


Step 1: Loosen the locknut under the tank

Use a wrench to turn the plastic locknut counterclockwise.

Note: Some two-piece toilets have tight spaces that make it hard to reach the locknut. In such cases, you may need to detach the tank from the bowl for easier access.


Step 2: Pull out the old toilet fill valve

Lift the valve out from inside the tank. If it’s stuck, gently wiggle it back and forth to loosen it.


Step 3: Inspect and clean the inlet hole

Check for debris, hard water buildup, or damage. Clean the area with a cloth and inspect the rubber gasket—replace it if worn.


 Installing the New Fill Valve


Step 1: Adjust the new valve’s height based on the old one

Compare the old and new toilet fill valves, and adjust the body and float of the new valve to match the original height. Ensure the float doesn’t interfere with other tank components.


Step 2: Insert the valve into the tank

Slide the valve into the inlet hole with the rubber washer seated snugly inside the tank.


Step 3: Tighten the locknut from below

Secure the valve by tightening the locknut underneath the tank. Hand-tighten first, then use a wrench with light pressure.


Step 4: Reconnect the water supply hose

Attach the hose to the bottom of the new fill valve. Ensure a snug and leak-free fit.


Step 5: Connect the refill tube to the overflow pipe

Insert the refill tube into the flush valve’s overflow pipe and clip it in place. This small tube directs water into the bowl during refilling to maintain the water seal.


Testing and Adjustments


Step 1: Turn the water supply back on

Slowly reopen the shut-off valve and let the tank fill.


Step 2: Check for leaks

Inspect the base of the tank and the hose connection. If there are any drips, retighten the fittings.


Step 3: Adjust the water level

Use the height adjustment screw or float slider to fine-tune the fill level. The water should sit 1–2 cm below the top of the overflow tube.


Step 4: Test the flush

Flush the toilet 2–3 times to make sure everything works correctly and there are no slow fills or continuous running.


Tips and Common Issues


Common Issues Tips
How do I know the fill valve height is correct? The water level should sit just below the overflow pipe—typically 1–2 cm lower.
What if water fills too slowly?

Make sure the shut-off valve is fully open.

Check if the hose is kinked or clogged.

Remove and clean the valve’s filter screen.

Why doesn’t the water stop filling?

The float may be stuck or set too high.

The internal seal might be worn out.

Try readjusting the float or replacing the valve’s internal components.


Replacing a toilet fill valve may seem technical, but with the right tools and a bit of patience, it’s a simple DIY task that anyone can accomplish. You’ve now learned how to identify issues, remove the old valve, install a new one, and make adjustments to ensure a perfect flush.


If you're looking for a reliable universal fill valve, consider one with adjustable height, a built-in filter, and quiet fill technology for a better experience.


Still have questions? Visit our Product page and select the Toilet Fill Valve category. Each product includes an installation video—simply choose the model that most closely matches your setup and follow along.


Take control of your home maintenance—one flush at a time!

READ MORE >

What is a Dual Flush Toilet ?

1. Introduction


In modern homes and commercial spaces, dual flush toilets have become a mainstream choice for water conservation and environmental protection. Unlike traditional single-flush toilets, dual flush toilets offer two flushing modes—half flush and full flush—allowing users to select the appropriate water volume based on actual needs, effectively reducing water waste.

The design of dual flush toilets not only aligns with sustainability trends but also helps lower long-term water costs while providing more efficient flushing performance. Whether in homes, hotels, or public restrooms, dual flush toilets are widely favored for their water-saving, efficient, and durable features.

In this article, we will explore the water fittings of dual flush toilets and provide a detailed introduction to their key components, helping you better understand and choose the right products.


2. Water Fittings of a Dual Flush Toilet


The efficient operation of a dual flush toilet depends on the coordination of several core water fittings, each playing a crucial role in controlling water flow, optimizing flushing performance, and conserving water.

In general, the primary water fittings in a dual flush toilet include the toilet fill valve, toilet flush valve, and toilet flush button. Among these, the toilet flush valve and toilet flush button are key to the dual flush system, determining how the half and full flush functions are executed.

  • Toilet Flush Valve: This component is responsible for releasing water from the tank to flush the bowl. Dual flush toilets typically use either a bucket-type dual flush valve or a cable-operated dual flush valve, ensuring precise water flow control and effective flushing.
  • Toilet Fill Valve: This component controls the refilling of the toilet tank after flushing, maintaining a stable water level to ensure proper operation.
  • Toilet Flush Button: The user operates the button to choose between a half or full flush. Depending on the installation type, toilet flush buttons can be top-mounted, side-mounted, or wall-mounted (for concealed cisterns).

A well-configured set of water fittings not only impacts flushing performance but also determines the toilet's lifespan and maintenance costs. In the following sections, we will provide a detailed overview of toilet flush valves and toilet flush buttons, helping you understand their functions and key selection criteria.


3. Introduction to Key Components


3.1 Toilet Flush Valve

  • Function: The toilet flush valve is the core component of the toilet’s flushing system, controlling water release for both half and full flushes.
  • Common Types: Bucket-type dual flush valve and cable-operated dual flush valve. These two designs differ in installation and operation but both effectively manage water volume and optimize flushing performance.
  • Selection Criteria:
    • Size: Choose between a 2-inch or 3-inch toilet flush valve based on the toilet’s flush outlet size to ensure compatibility.
    • Overflow Pipe Height: Ensure it matches the toilet tank height to prevent overflow issues.
    • Overall Toilet Flush Valve Height: Should fit within the tank space for stable installation and effective flushing performance.

Selecting the right toilet flush valve can enhance the toilet’s flushing performance while reducing water consumption and maintenance costs. When installing or replacing a toilet flush valve, always ensure it matches the toilet’s specifications for the best results.

3.2 Toilet Flush Button

  • Function: The toilet flush button is a critical user interface component that operates the toilet flush valve, allowing selection between half and full flush modes.
  • Common Types: Based on installation type, toilet flush buttons can be top-mounted, side-mounted, or wall-mounted, suitable for different toilet designs.
  • Selection Criteria:
    • Button Size: Common sizes include 38mm, 48mm, and 58mm. The correct size should match the tank hole diameter for proper installation.
    • Installation Type: Determine whether a top-mounted or side-mounted toilet flush button is required, depending on the toilet design.
    • Wall-Mounted Button Compatibility: For concealed cisterns, ensure the flush plate is compatible with the concealed tank, preventing installation and operational issues.

Choosing the right toilet flush button affects user experience and ensures precise flushing control. When selecting a toilet flush button, consider the toilet tank structure and personal preferences to achieve optimal convenience and performance.


4. Conclusion


Understanding the water fittings and key components of dual flush toilets reveals that selecting the right toilet flush valve and toilet flush button requires considering multiple factors, such as flush outlet size, overflow pipe height, installation type, and button size. These factors determine compatibility and performance, making the selection process complex for different markets.

For buyers uncertain about local toilet specifications or dealing with a variety of toilet types in their market, the most hassle-free solution is to choose a cable-operated dual flush valve with an adjustable overflow pipe. This type of toilet flush valve allows height adjustment to fit different tank designs, reducing installation issues. In this case, buyers only need to focus on the toilet flush valve size (2-inch or 3-inch) and toilet flush button size (38mm, 48mm, or 58mm), simplifying the selection process while ensuring a high success rate in compatibility.

Selecting the right water fittings not only enhances toilet performance and durability but also minimizes the risk of installation errors and additional costs. Jielin Plumbing offers a wide range of high-quality dual flush toilet accessories, catering to different market needs and helping buyers easily find the most suitable products.

READ MORE >

Capacity expansion is on the way, is the market demand for high-speed interconnection wire harness components optimistic?

Looking back from the new starting point of 2025, we have experienced an extraordinary 2024 together. The global cable industry is undergoing structural changes: on the one hand, the AI ​​computing power revolution has spawned new opportunities, and the high-speed interconnection product line has maintained a compound growth rate of more than 30% for 18 consecutive months; on the other hand, the industry reshuffle has accelerated, and the profit margins of 78% of traditional cable categories have fallen below the 5% warning line. The high-speed interconnection supply chain is one of the product lines that currently maintains both profit and market growth. However, it is worth noting that the computing power arms race has entered a white-hot stage-the DeepSeeK algorithm revolution has compressed the computing power demand to 1/10 of ChatGPT, and NVIDIA has monopolized 83.7% of the global GPU market share with the H100/H200 series. This technological monopoly is triggering the reconstruction of the global supply chain. We have seen that Middle Eastern capital has set up a tens-billion-level GPU transit warehouse in South Korea through the Saudi sovereign fund, and India's Tata Group has jointly launched the "computing power corridor" plan with SoftBank. The domestic industrial landscape is also changing: H3C won a 15 billion high-speed order from Alibaba in a single month, Huawei's 8 billion AI server project was launched ahead of schedule, and the growth rate of the East China market was 42 percentage points higher than the traditional market in North China. This computing power revolution is reshaping our industrial landscape at an astonishing speed.

The most common application interfaces of high-speed interconnect cable harness components are SlimSAS, MICO, GEN Z, CXL, etc., all of which are dedicated to high-performance interconnect technology on the server side. Its mission is to enable processor-level bandwidth, from processor to system I/O to storage network, to traverse the entire data center, forming a unified neural network including server interconnection, server and storage interconnection, and storage network. These technologies are open standard high-bandwidth, high-speed network interconnection technologies. At present, their development speed is very fast, and more and more large manufacturers are joining or returning to its high-performance computer interconnection technology camp, so the demand for connected high-speed components is growing rapidly. In the existing resource library, there are 34 finished component factories. The difficulty of producing high-speed cable finished components is mainly to ensure the consistency and reliability of batch output. The difficulty lies in meeting the requirements of high transmission indicators, precise structural design and process control, high conductor requirements, material selection and cost balance, mass production and consistency, etc., to ensure stable performance during large-scale applications. 

high speed cable

According to the current market dynamics and industry analysis, the high-frequency and high-speed cable components used in AI servers have not yet seen a global overcapacity, but there is a structural contradiction, that is, insufficient supply of high-end products, and repeated investment in low-end technology may lead to local overcapacity risks. International giants occupy the high-end market and obtain the main profit space by relying on technology monopoly, while domestic enterprises compete fiercely in the mid- and low-end fields but have meager profits, and most of them are OEMs for the top four companies. In the future, with the acceleration of domestic substitution and technological breakthroughs, high-end production capacity is expected to be gradually released, but we need to be vigilant against the risk of local overcapacity caused by repeated investment in the low end. The following is a specific analysis:


Demand side: AI server growth drives a surge in demand for high-frequency and high-speed cables

Explosion of computing power demand

The rapid development of AI servers has put forward higher requirements for high-frequency and high-speed cable components. For example, the power consumption of a single cabinet of NVIDIA's AI server is close to 200kW, and may reach 1MW in the future, which puts higher requirements on the signal transmission rate, heat dissipation capacity and stability of the cable.


According to TrendForce's forecast, AI server shipments are expected to grow by 41.5% in 2024, and may still maintain a growth rate of 20%-35% by 2025, directly driving the growth of demand for high-frequency and high-speed cables.

Technology upgrade requirements

The interconnection standard of AI servers has evolved from PCIe 4.0 to PCIe 5.0/6.0, which requires higher transmission rates (such as high-frequency signals above 56GHz) and low-loss performance (low Dk/Df values) of cables. Traditional cables can no longer meet the requirements and need to rely on high-frequency high-speed cable assemblies.

Substitution and supplementary role

In short-distance connection scenarios (such as within a rack and between chips), high-frequency high-speed copper cables have become the mainstream choice for partial replacement of optical fibers due to their low cost and good compatibility. It is estimated that by 2027, the annual compound growth rate of high-speed copper cable shipments will reach 25%, and the market size will reach 20 million.


Supply side: insufficient high-end production capacity, low-end production capacity faces the risk of overcapacity

High-end products rely on imports and technical barriers

The core technologies of high-frequency high-speed cables (such as high-frequency signal integrity design and high-performance copper clad laminate materials) are still monopolized by international giants such as Amphenol and Tyco. Although domestic companies have made breakthroughs in the field of copper clad laminate resins (such as BMI and PPO), the large-scale production capacity of high-end cable assemblies has not yet been fully formed.

Low-end homogeneous competition

The traditional cable industry has a problem of low-end overcapacity. Some companies have tried to turn to the high-frequency and high-speed field, but due to insufficient technology, they have repeated low-level investments. In fact, high-speed lines are not as simple as you think. From structural design to production equipment, more attention needs to be paid to details, especially the requirements for equipment and process materials will be more stringent.


Market structure: structural imbalance and domestic substitution opportunities

Supply and demand mismatch

The high-end cable components in the global AI server market are still in short supply, especially for products such as 224Gbps SerDes and liquid-cooled compatible cables. International manufacturers have saturated orders and extended delivery cycles. However, due to technical and financial limitations, some domestic companies can only produce mid- and low-end products. The equipment investment after 6.0 is already at another level, resulting in local overcapacity.

Future trends: technology upgrades and industry integration


Technology iteration direction

High-frequency and high-speed cables will develop towards higher frequency bands and lower losses, and need to be compatible with liquid cooling systems. The popularity of cold plate liquid cooling will further promote the miniaturization and high-density design of cable components.

READ MORE >